Configuring OAuth
Using OAuth requires a bit of configuration in the Turnkey Dashboard and your app configuration.Enabling OAuth
Navigate to the Wallet Kit section in the Turnkey Dashboard and enable the OAuth. Note if you have not enabled the Auth Proxy, you will need to do so first. Check out the Getting Started guide for more details.
Configuring OAuth providers
You must enable the OAuth providers you want to use in the Social logins section.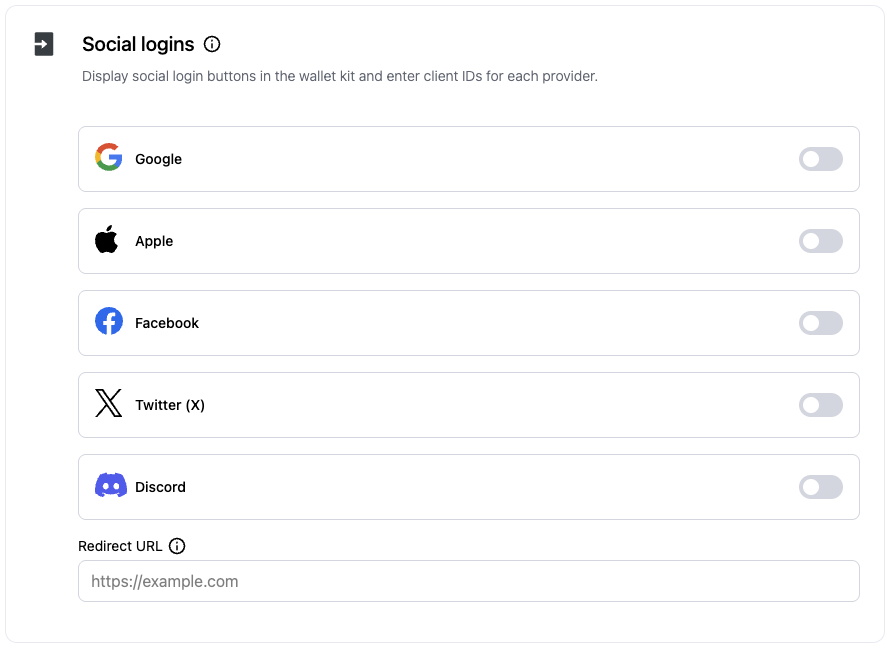
Client IDs
You can choose to enter your client IDs for each OAuth provider and the redirect url in the dashboard

TurnkeyProvider’s config.
This is useful if you want to use different OAuth client IDs or a different redirect URL for different environments (e.g., development, staging, production).
You can retrieve the client IDs from the OAuth provider’s dashboard. Note that the redirect URI must match the one you configured in the dashboard or in the TurnkeyProvider config.
For OAuth2.0 providers, you will need to upload the client ID and secret in
the dashboard. Check out the OAuth2.0
providers
section for more details.
Client Configuration
If you choose to provide the client IDs and redirect URI through environment variables, you can do so in theTurnkeyProvider’s config..
Additionally, you must provide auth.oauth.appScheme in your app config in order to use the deep link completion for OAuth in React Native.
constants/turnkey.ts
app.json includes your deep link scheme:
app.json
Usage
In your app, call the corresponding helper for each provider fromuseTurnkey: handleGoogleOauth, handleAppleOauth, handleFacebookOauth, handleDiscordOauth, and handleXOauth.
app/index.tsx
Provider details
Oauth providers
- Dashboard: enable Google in Wallet Kit → Authentication.
- Client ID: use a Web client ID in the Google developer console and set it in the Dashboard or in the
TurnkeyProvider’s config.
Apple
Requirements:- Turnkey Dashboard: enable Apple.
- Client ID: set Apple Services ID in the Dashboard or in the
TurnkeyProvider’s config. - Provider Dashboard: Set the Redirect URI to
myapp://
- Turnkey Dashboard: enable Facebook.
- Client ID: set in Dashboard or in the
TurnkeyProvider’s config. - Provider Dashboard: Set the Redirect URI to
myapp://
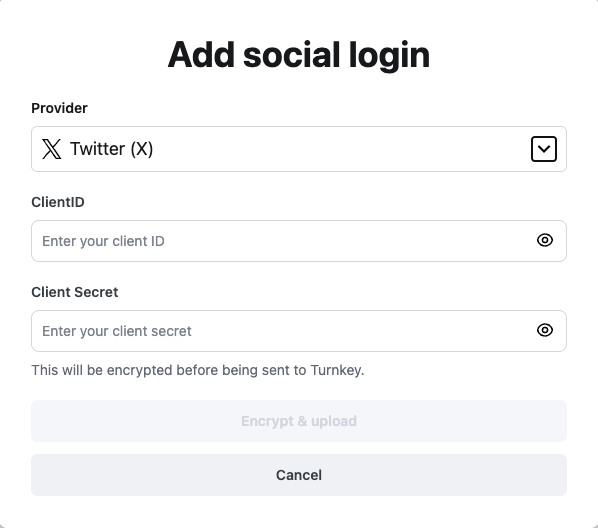
OAuth2.0 providers
For OAuth providers that exclusively use OAuth2.0 (e.g., X, Discord), you will need to configure a few additional settings in your Turnkey Dashboard. In the Wallet Kit section of the dashboard, head to the Socials tab and click Add provider.

TurnkeyProvider’s config as shown above.

Discord
Requirements:- Turnkey Dashboard: enable Discord (OAuth 2.0 provider).
- Client ID: set in Dashboard or in the
TurnkeyProvider’s config. - Provider Dashboard: Set the Redirect URI to
myapp://
X (Twitter)
Requirements:- Turnkey Dashboard: enable X (OAuth 2.0 provider).
- Client ID: set in Dashboard or in the
TurnkeyProvider’s config. - Provider Dashboard: Set the Redirect URI to
myapp://